Solar panels allow homeowners to generate electricity from sunlight and reduce their reliance on power from the utility grid. However, installing a solar energy system involves more than attaching panels to a roof. It requires careful planning, a suitable roof, properly sized electrical equipment, safe wiring, and testing before the system can begin producing usable electricity.
If you are considering solar panels for your home in New Hampshire, understanding the installation process can help you prepare for the project and make informed decisions. From the initial roof inspection to the final system activation, each step plays an important role in the safety and performance of your solar installation.
In this guide, Baldr Electric LLC explains how residential solar panel installation works, what equipment is required, how the system connects to your home’s electrical system, and what homeowners should know before getting started.
How Does Solar Panel Installation Work?
A typical residential solar installation involves evaluating the property, designing the system, obtaining the necessary permits, mounting the panels, installing electrical components, and completing safety inspections.
Solar panels capture sunlight and convert it into direct current (DC) electricity. An inverter then converts that electricity into alternating current (AC), which most household appliances use. Depending on the system design, the electricity can power your home, charge a battery, or flow to the utility grid when permitted.
The exact installation process depends on your roof type, energy consumption, electrical panel capacity, local requirements, and whether you plan to include battery storage.
Step 1: Evaluate Your Roof and Property
Before installing solar panels, a qualified professional must determine whether your property is suitable for a solar energy system.
Several factors affect how well a rooftop solar installation can perform.
Roof direction and slope
The direction your roof faces and its slope influence how much sunlight the panels receive throughout the day. South-facing roof sections are often favorable in the Northern Hemisphere, but east- and west-facing roofs can also support productive solar systems.
Roof condition
Your roof should be in good condition before panels are installed. If shingles are damaged, the roof is nearing the end of its service life, or structural repairs are needed, addressing those issues first can help avoid the expense of removing and reinstalling panels later.
Shade and sunlight exposure
Trees, chimneys, neighboring buildings, and other obstructions can reduce solar production. A site assessment helps identify shaded areas and determine the most suitable panel arrangement.
Available roof space
The amount of usable roof area helps determine how many panels can fit and how much electricity the system may generate.
For New Hampshire homeowners, seasonal sunlight and winter snow should also be considered when estimating annual solar production.
Step 2: Review Your Electricity Usage
The next step is to understand how much electricity your household uses and when you use it.
An installer or solar system designer may review your utility bills to estimate your average monthly and annual consumption. This information helps determine the system size that makes sense for your property.
For example, a household that regularly uses electricity for heating, cooling, laundry, and electric vehicle charging may need a different system than a home with lower energy consumption.
Your future plans also matter. If you expect to purchase an electric vehicle, install a heat pump, or add other major electrical equipment, these changes should be considered during system design.
A properly sized system should reflect your energy needs, available roof space, budget, and utility rules rather than simply maximizing the number of panels on your roof.
Step 3: Design the Solar Energy System
Once the property and electricity usage have been evaluated, the next step is selecting the system components and planning their installation.
A typical residential solar system includes the following equipment.
Solar panels: These modules capture sunlight and produce DC electricity.
Inverter: This equipment converts DC electricity from the panels into AC electricity for household use. Depending on the design, a system may use a string inverter, microinverters, or power optimizers with compatible equipment.
Mounting hardware: Rails, brackets, and other approved components secure the panels to the roof or another mounting surface.
Electrical wiring and protection: Conductors, disconnects, overcurrent protection, grounding, and other required equipment help connect and protect the system.
Monitoring equipment: Many systems include monitoring features that allow homeowners to track energy production and identify potential performance issues.
Battery storage (optional): A compatible battery stores electricity for later use. Whether it can provide backup power during an outage depends on the system’s design and installed backup equipment.
The final design should account for equipment compatibility, roof conditions, electrical capacity, applicable building and electrical codes, and utility interconnection requirements.
Step 4: Obtain Permits and Utility Approvals
Before installation begins, the project may require building or electrical permits, inspections, and approval from the local electric utility.
Requirements vary by municipality, utility, and system configuration. A grid-connected solar system generally needs an approved interconnection arrangement before it can operate in parallel with the utility grid.
The project team should confirm which permits and approvals are required and who is responsible for obtaining them.
For homeowners in Concord and other parts of New Hampshire, it is important to verify the requirements that apply to the specific property and utility provider. Do not assume that approval in one town automatically means the same process applies elsewhere.
Completing this step before construction helps reduce delays and ensures the installation follows the applicable requirements.
Step 5: Install the Roof Mounting System
Once the required preparations and approvals are in place, the physical installation can begin.
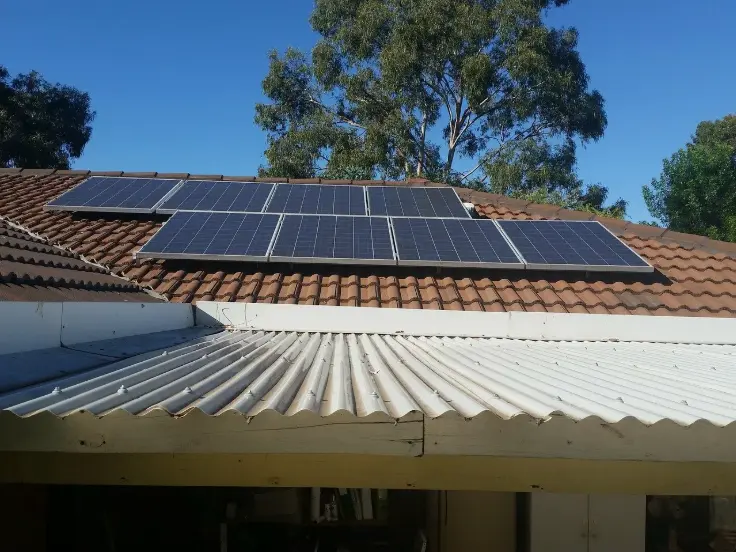
For a typical roof-mounted system, installers identify the appropriate attachment points and secure the mounting hardware to the roof structure. Rails or other approved mounting components are then installed to support the solar panels.
Proper mounting is essential because the system must withstand local weather conditions, including wind and snow loads where applicable.
The mounting process also requires attention to roof penetrations and waterproofing. Incorrectly installed attachments can create leaks or damage roofing materials.
For this reason, roof work should be performed by qualified professionals using equipment and installation methods appropriate for the roof type and system design.
Not every solar system is roof-mounted. Depending on the property, a ground-mounted installation may be another option.
Step 6: Mount and Secure the Solar Panels
After the mounting structure is ready, the solar panels are positioned and secured according to the approved layout.
Installers arrange the modules to make effective use of available sunlight while maintaining the spacing, clearances, and access required by the system design.
Panels are connected using compatible electrical connectors and wiring. The array configuration depends on the equipment selected and the electrical characteristics of the system.
During this stage, the installation team should verify that the panels and mounting hardware are properly secured and that the wiring is protected from physical damage and environmental exposure.
Solar panels can be heavy and are installed at height, so this work requires appropriate fall protection and safe handling procedures.
Step 7: Connect the Inverter and Electrical System
Installing the panels is only part of the project. The system must also be connected safely to the home’s electrical infrastructure.
The inverter converts the DC electricity generated by the panels into AC electricity that can be used by household appliances.
Depending on the design, the inverter may be installed near the electrical service equipment, in a garage, or at another approved location. Equipment placement must follow manufacturer instructions and applicable electrical requirements.
A qualified electrician evaluates how the solar system will connect to the home’s electrical panel and service equipment.
Important considerations include:
- Whether the existing electrical panel has sufficient capacity for the proposed connection.
- Whether an electrical panel upgrade or other modifications are necessary.
- Proper circuit protection, grounding, disconnects, and labeling.
- Compatibility between the solar equipment and the home’s electrical system.
- Compliance with applicable electrical codes and utility requirements.
Does every home need an electrical panel upgrade for solar?
No. Some homes can accommodate a solar connection using their existing electrical equipment, while others may require modifications or an upgrade. The answer depends on the panel rating, busbar rating, existing loads, proposed system configuration, and applicable code requirements.
A professional electrical assessment can identify potential issues before installation begins.
Step 8: Add Battery Storage or an EV Charger if Needed
Some homeowners choose to combine solar panels with additional equipment to make better use of their electricity.
Solar battery storage
A battery can store excess solar energy for later use, such as in the evening when the panels are no longer generating electricity. Depending on the equipment and configuration, a battery system may also provide backup power during an outage.
Battery installation requires compatible equipment, appropriate electrical protection, and a suitable installation location.
Home electric vehicle charging
Homeowners who drive electric vehicles may also consider installing an EV charger as part of a broader electrical upgrade.
A solar system and an EV charger can work together when the equipment supports the required controls and energy management features. However, charging an electric vehicle directly from available solar production depends on the system configuration, vehicle charging schedule, and household electricity demand.
Planning for these additions early can help avoid unnecessary electrical modifications later.
Step 9: Complete Safety Checks and Inspections
Before the system is approved for operation, the installation must undergo the required checks and inspections.
Depending on the project, these may include a local electrical inspection, building inspection, utility review, and verification that the equipment has been installed according to its approved design.
The installation team should verify the electrical connections, grounding, protection devices, equipment labeling, and inverter configuration. The system is also checked to confirm that it operates as intended and reports energy production correctly.
Any problems identified during inspection must be addressed before the system proceeds to the next stage.
These checks help protect the property, occupants, utility workers, and equipment while reducing the risk of electrical faults.
Step 10: Obtain Permission to Operate and Activate the System
A grid-connected solar system should not be switched on for normal grid-parallel operation until the required approvals have been completed.
The utility may need to review the installation, confirm the interconnection arrangements, and issue permission to operate. The exact process varies by utility and project.
Once authorization is received, the system can be activated according to the manufacturer’s instructions and the approved installation procedures.
Homeowners should receive information about monitoring system performance, understanding production readings, recognizing warning indicators, and contacting the appropriate professional if a problem occurs.
It is also useful to keep copies of permits, inspection records, equipment documentation, and applicable warranties for future reference.
How Long Does Solar Panel Installation Take?
The physical installation of a residential rooftop solar system may take a few days, depending on the system size, roof complexity, weather, electrical work, and whether battery storage is included.
However, the complete project often takes longer because site assessments, system design, equipment delivery, permits, inspections, and utility approval must also be completed.
There is no single timeline that applies to every home. A straightforward installation may progress more quickly than a project that requires roof repairs, an electrical panel upgrade, or additional utility coordination.
Before scheduling the work, ask the installer for an estimated timeline that separates the physical installation from the permitting and approval stages.
What Does Solar Panel Installation Cost?
The cost of solar panel installation depends on several factors, including:
- The size and type of the solar system.
- The number of panels and the equipment selected.
- Roof accessibility, condition, and mounting requirements.
- Electrical panel upgrades or other wiring modifications.
- Optional battery storage or EV charging equipment.
- Permits, inspections, and utility-related requirements.
Because these factors vary from property to property, homeowners should request a project-specific estimate rather than rely on a general price.
When comparing estimates, review the complete scope of work, equipment specifications, installation responsibilities, warranties, and any exclusions. The lowest initial price does not necessarily represent the best overall option if important work or equipment is excluded.
Is Solar Panel Installation Worth It in New Hampshire?
Solar panels may be worth considering for New Hampshire homeowners who want to generate electricity on their property and reduce the amount of electricity they purchase from the grid.
However, the financial and practical benefits depend on individual circumstances.
Factors to evaluate include your electricity rates, annual energy consumption, roof orientation, shading, installation cost, expected system production, available utility compensation for exported electricity, and financing arrangements.
New Hampshire’s seasonal weather also matters. Solar panels can generate electricity during winter, but shorter days, snow coverage, and changing weather conditions affect production. A system should be evaluated using estimated annual output rather than assuming it will generate the same amount of electricity every month.
Homeowners should also verify current federal, state, local, and utility incentives before including them in their financial calculations. Incentive eligibility and program rules can change.
A qualified solar professional can help estimate production and explain the assumptions behind the expected savings.
Frequently Asked Questions About Solar Panel Installation
Can solar panels be installed on any roof?
No. Many roof types can support solar panels, but suitability depends on structural condition, available space, shading, roof orientation, and mounting requirements. Some roofs may need repairs or other preparation before installation.
Do I need to upgrade my electrical panel before installing solar panels?
Not always. The existing panel may be suitable for the proposed solar connection, but some installations require an electrical panel upgrade or other modifications. An electrician should assess the existing equipment and proposed system before work begins.
Can solar panels work during a power outage?
A standard grid-connected solar system generally shuts down during a utility outage to protect utility workers and comply with safety requirements. A system designed with compatible battery storage and backup equipment may be able to power selected circuits or other approved loads during an outage.
Do solar panels work during winter in New Hampshire?
Yes, solar panels can produce electricity during winter when sunlight is available. However, shorter daylight hours, snow accumulation, shading, and weather conditions can reduce production. Annual energy estimates should account for seasonal variations.
Can I install solar panels myself?
Although some components may appear straightforward, a complete solar installation involves roof work, electrical connections, protective equipment, and permitting or inspection requirements. Professional installation is the safer choice for most homeowners and helps ensure that the system complies with applicable codes and manufacturer instructions.
Can I add a battery to an existing solar system?
In many cases, yes. However, compatibility depends on the existing inverter, battery technology, system configuration, available electrical capacity, and backup requirements. A professional assessment can determine which options are suitable.
Do solar panels require maintenance?
Solar panels generally require relatively little routine maintenance, but the system should be monitored for changes in production, visible damage, equipment warnings, or other issues. Follow the manufacturer’s maintenance instructions and arrange professional service when necessary. Avoid climbing onto the roof to inspect or clean panels yourself.
Plan Your Solar Installation With the Right Electrical Preparation
Installing solar panels involves several connected steps, from evaluating your roof and designing the system to installing the mounting hardware, connecting the electrical equipment, and obtaining permission to operate. Careful planning helps ensure that each part of the project works together safely and effectively.
For homeowners in Concord, NH, and surrounding communities, understanding your home’s electrical capacity is an important part of planning a solar project. An electrical assessment can help identify whether your existing panel and wiring are suitable or whether modifications may be needed.
Baldr Electric LLC provides electrical services for residential and other electrical projects. Contact the company to discuss your electrical requirements and determine whether its available services are suitable for your planned solar installation.
A well-planned project starts with understanding your property’s needs, choosing compatible equipment, and ensuring that the electrical work meets the applicable safety requirements.